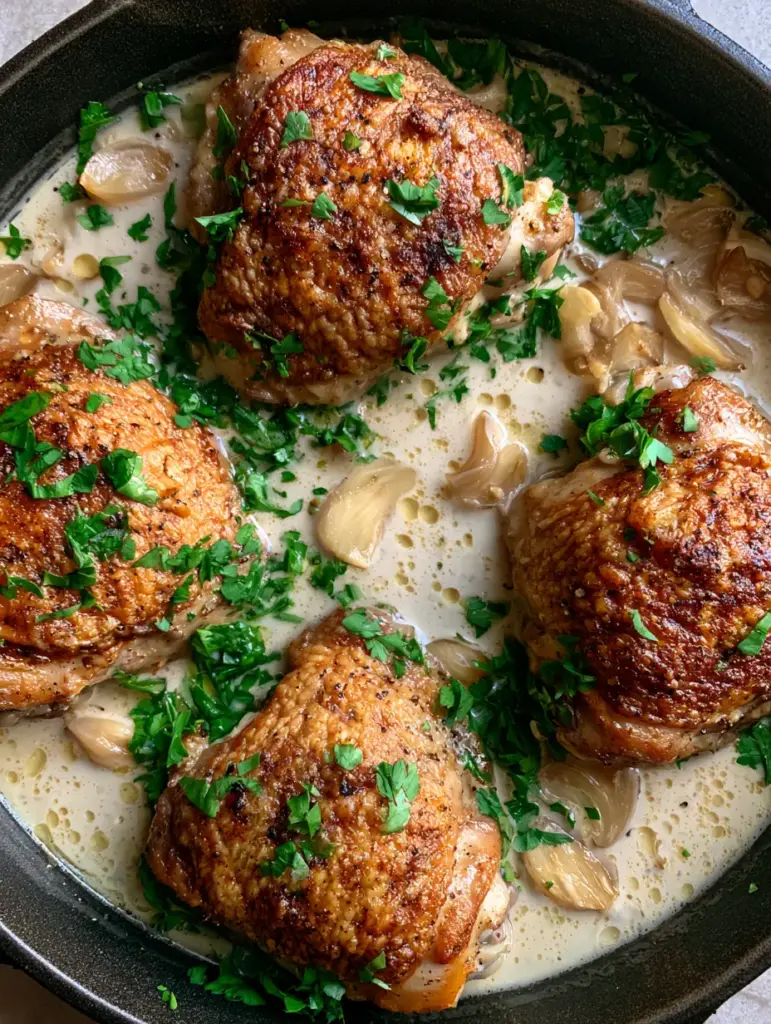
If you are looking for the ultimate comfort food, these Creamy Garlic Chicken Thighs are about to become your new weeknight obsession. Imagine bone-in chicken thighs with crispy golden-brown skin, nestled in a pool of thick, velvety garlic cream sauce that is bubbling with flavor. This recipe is designed specifically for the home cook who wants restaurant-quality results using a simple cast iron skillet and fresh ingredients. The combination of savory seared chicken and translucent, softened garlic slices creates a sensory experience that looks as good on your Pinterest feed as it tastes on your plate.
Why These Cast Iron Skillet Chicken Thighs Win Every Time
- Unbeatable Texture: We use a specific searing technique to ensure the chicken skin remains deeply golden-brown and textured, providing a crunch that contrasts perfectly with the velvety sauce.
- Garlic Lover’s Dream: Unlike recipes that use just a hint of garlic, we use 10 to 12 sliced cloves that soften into translucent “garlic chips” throughout the cream.
- One-Pan Simplicity: By using a dark cast iron skillet, you develop a deep fond (those flavorful brown bits) that acts as the foundation for the entire Creamy Garlic Chicken Thighs experience.
- Pinterest-Ready Visuals: The pop of freshly chopped bright green parsley against the off-white cream sauce makes this dish a viral sensation waiting to happen.
If you love the depth of flavor that comes from pan-searing poultry, you should also check out my Garlic Parmesan Chicken and Potatoes or this incredibly comforting French Onion Chicken Orzo.
The Essential Elements for a Velvety Garlic Cream Sauce
To achieve the high-RPM visual of tiny oil droplets and small bubbles simmering in a thick sauce, you need high-quality fats and aromatics. Here is what you will need for these Creamy Garlic Chicken Thighs:
4 Bone-in, Skin-on Chicken Thighs (approx. 1.5 lbs / 680g): Bone-in thighs stay juicy under high heat and provide the fat rendered for the sauce base.
1 tablespoon (15ml) Olive Oil: This prevents the chicken from sticking during the initial sear before its own fats render out.
1/2 teaspoon (3g) Kosher Salt & 1/2 teaspoon (1g) Coarse Black Pepper: Essential for building that textured, seasoned crust visible in the final dish.
10-12 Fresh Garlic Cloves: Sliced thin rather than minced. This ensures they soften and become translucent without burning, providing a “melt-in-your-mouth” texture.
1 cup (240ml) Heavy Cream: The high fat content is non-negotiable for that velvety, off-white finish that doesn’t split when simmering.
1/2 cup (120ml) Chicken Broth: Used to deglaze the skillet and scrape up the golden fond left behind by the chicken.
1/4 cup (15g) Fresh Flat-Leaf Parsley: Chopped finely for a heavy garnish that provides the essential bright green contrast.
For a different twist on creamy poultry, you might also enjoy the flavors in Boursin Chicken Orzo or my Longhorn Parmesan Crusted Chicken.

Step-by-Step Guide to Gold-Standard Crispy Chicken
Prepping the Skillet and Chicken
Start by patting your chicken thighs bone-in completely dry with paper towels. Moisture is the enemy of crispy skin. Season both sides generously with salt and black pepper. You want to see those black pepper specks on the skin, as they add both flavor and visual texture once seared.
The Art of the Cast Iron Sear
Heat your olive oil in a dark cast iron skillet over medium-high heat. Place the chicken thighs skin-side down. Do not move them. Let them sear for 7-9 minutes until the fat has rendered and the skin is a deep, hammered golden-brown. Once crispy, flip and cook for another 5 minutes, then remove the chicken to a plate. The skin should be stiff and textured.
Building the Translucent Garlic Base
Lower the skillet heat to medium. You should have a layer of liquid gold (chicken fat) in the pan. Toss in your sliced garlic cloves. Sauté them for 2 minutes until they become translucent and softened. Do not let them turn dark brown or bitter. The goal is a soft, buttery consistency that blends into the sauce.
Deglazing and Simmering the Cream
Pour in the chicken broth, using a wooden spoon to scrape every bit of flavor from the bottom of the skillet. Pour in the heavy cream and bring to a gentle simmer. You will see small bubbles and tiny oil droplets forming on the surface—this is the sign of a perfectly emulsified sauce. Let it reduce for 3-4 minutes until thick enough to coat the back of a spoon.
The Final Simmer and Garnish
Nestle the chicken thighs back into the sauce, but keep the crispy skin above the liquid line to maintain that crunch. Let it simmer for another 2-3 minutes so the flavors meld. Finish with a heavy, heavy garnish of freshly chopped parsley for that Pinterest-perfect look.
Expert Tips for Success
- Room Temperature Meat: Take your chicken out of the fridge 20 minutes before cooking. This ensures the meat cooks evenly while the skin gets crispy.
- Avoid Overcrowding: If your skillet is too small, sear the chicken in batches. Crowding the pan creates steam, which leads to rubbery skin instead of crispy skin.
- The “Spoon Test”: The sauce is ready when it is thick enough that you can draw a line through it on the back of a spoon and the line stays clear.
- Internal Temp: Always use a meat thermometer. Bone-in thighs are perfectly done and safe to eat at 165°F (74°C).
Storage, Reheating, and Freezing
To Store: Keep leftovers in an airtight container in the refrigerator for up to 3 days. The sauce will thicken significantly as it cools.
To Reheat: Reheat in a skillet over low heat. Add a splash of broth or water to loosen the cream sauce. To keep the skin crispy, you can pop the chicken under the broiler for 1-2 minutes after the meat is warmed through.
Freezing: I do not recommend freezing this dish, as the heavy cream sauce may separate and become grainy upon thawing.
What to Serve With Creamy Garlic Chicken
This dish is incredibly rich, so it pairs best with items that can soak up that liquid gold sauce. Try it over a bed of Angel Chicken Rice or alongside some roasted root vegetables. For a lighter option, a simple green salad with a lemon vinaigrette helps cut through the richness of the heavy cream and garlic.
Frequently Asked Questions
I don’t recommend it. Lower fat alternatives are much more likely to curdle or split when mixed with the chicken juices and garlic, and the sauce won’t thicken properly.
Yes, you can use boneless thighs, but they will cook much faster (about 5-6 minutes per side). Note that you won’t get the same level of crispy skin as you do with bone-in thighs.
Use full-fat heavy cream and avoid boiling the sauce vigorously. A gentle simmer ensures the fat and liquid stay emulsified, resulting in a velvety texture.
Ensure the skin is bone-dry before searing and never fully submerge the skin in the sauce. The skin should sit just above the liquid line during the final simmer.
The Full Recipe: Creamy Garlic Chicken Thighs
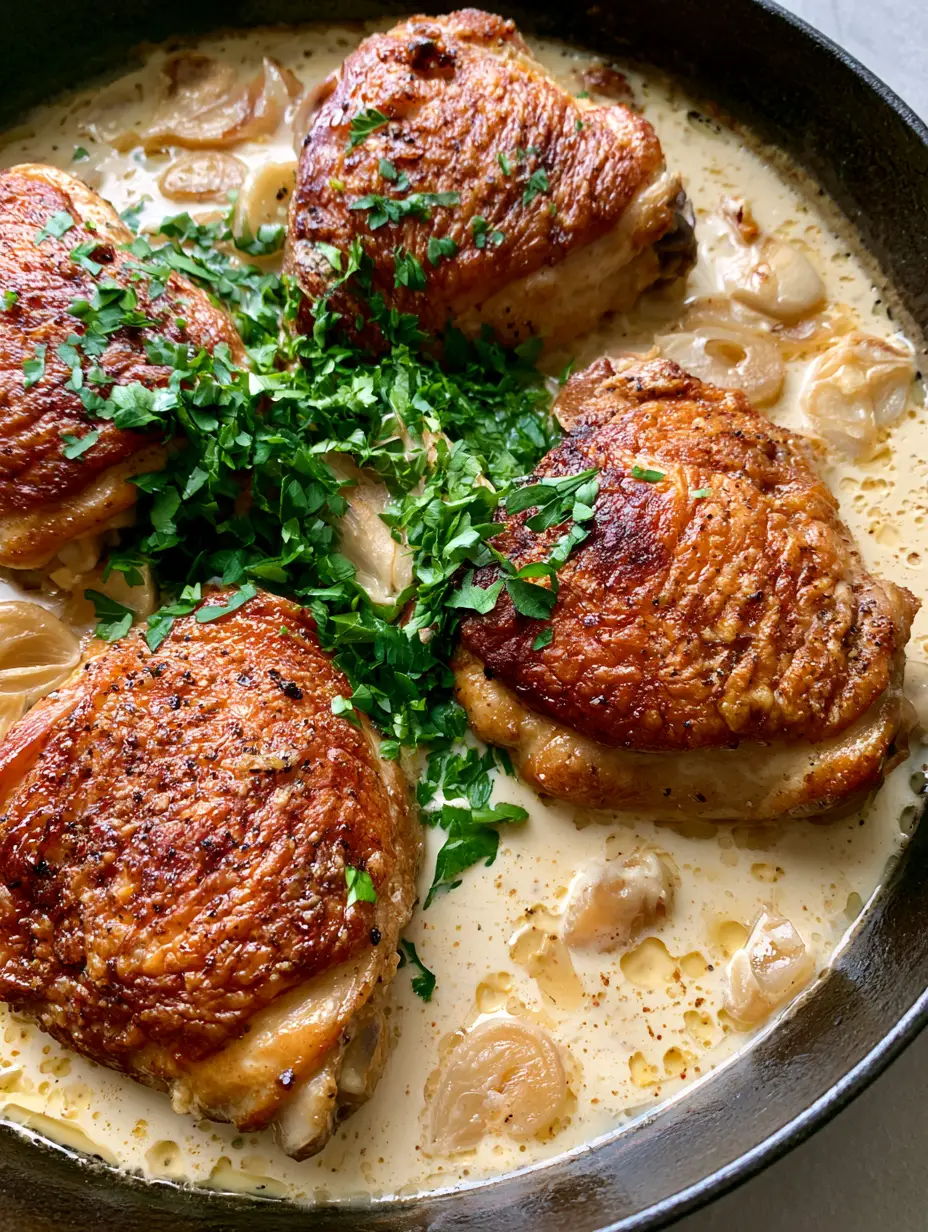
Creamy Garlic Chicken Thighs with Crispy Skin and Skillet Sauce
Ingredients
Equipment
Method
- Pat chicken thighs completely dry and season both sides with salt and pepper.
- Heat olive oil in a cast iron skillet over medium-high heat. Place chicken skin-side down and sear for 7-9 minutes until skin is golden-brown and crispy. Flip and cook for 5 more minutes. Remove and set aside.
- Reduce heat to medium. Add sliced garlic to the rendered fat and sauté for 2 minutes until translucent and softened.
- Pour in chicken broth and scrape the bottom of the pan to release the fond.
- Stir in heavy cream. Simmer for 3-4 minutes until the sauce thickens and shows small bubbles.
- Return chicken to the skillet, keeping the skin above the sauce. Simmer for 2 minutes to heat through.
- Top with a heavy handful of chopped fresh parsley before serving.
Notes
Do not submerge the crispy skin in the sauce once you return it to the pan.

Save, Share, and Rate This Recipe!
Did you make these Creamy Garlic Chicken Thighs? If so, I would love to see your results! Please leave a 5-star rating in the recipe card below and tag @eva_ovens on Pinterest so I can see your beautiful skillet shots. Don’t forget to pin this recipe to your “Easy Dinner Ideas” board so you never lose it. Your engagement helps me keep creating free recipes for this community!